Hi Everyone
Hope you all had a great Thanksgiving. My daughters were both home from university, and it was really lovely to see them and spend time with them - now I find myself playing catch-up with my blog (again!)
Today my project is this sweet 'Drop Ornament' designed by Kelleigh Ratzlaff over at The DigiChick, which can be found here.
This cuts out all in one piece, all you need is a little glue on each of the tabs and it assembles in minutes. I decorated mine with snowflakes - the smaller ones are made using a Martha Stewart snowflake punch and the larger one is a file from the Silhouette online store. I finished each of them off with a little bling.
Here is a closer look at the large snowflake - the layers are popped up with dimensionals.
The paper I used for this project is from DCWV 'Winter Magic' stack. I am definitely going to make more of these ornaments, and I think I will add a window with acetate to 2 of the sides so you can peek in and see the goodies inside (I'm thinking M&M's in Christmas colours.)
Thanks for joining me today.
Michelle
Showing posts with label Digi Chick. Show all posts
Thursday, November 29, 2012
Friday, November 2, 2012
A Trio of Canister Boxes
Hi Everyone
Today I have a very cute project, a canister box designed by Kelleigh Ratzlaff over at The Digichick.
There are just 2 pieces to this box, the body and the bottom - how easy is that? Kelleigh has a great tutorial here, which I would really recommend taking a look at. The boxes are super simple to put together, but folding the top down and getting it to look right can be a bit tricky - the first time I did it I folded 'petals' on the inside.
Here is a closer look at each box.
The paper I used is by Teresa Collins, and is from a line called 'Everyday Moments'. If you have ever used Teresa Collins paper before you will know how thick and sturdy it is - great for making these boxes. It is also double sided, here is a look at the box open so you can see the other side of the paper.
And a close look at the top of the box - so pretty.
Of course I had to finish the boxes off with a little tag using one of my favorite images from Krista Smith over at Saturated Canary called 'Boobie Love' (which is currently free in her shop.)
Don't forget to check out Kelleigh's Files at The Digichick, there is currently 40% off store-wide.
See you next time, thanks for stopping by.
Michelle
Today I have a very cute project, a canister box designed by Kelleigh Ratzlaff over at The Digichick.
There are just 2 pieces to this box, the body and the bottom - how easy is that? Kelleigh has a great tutorial here, which I would really recommend taking a look at. The boxes are super simple to put together, but folding the top down and getting it to look right can be a bit tricky - the first time I did it I folded 'petals' on the inside.
Here is a closer look at each box.
The paper I used is by Teresa Collins, and is from a line called 'Everyday Moments'. If you have ever used Teresa Collins paper before you will know how thick and sturdy it is - great for making these boxes. It is also double sided, here is a look at the box open so you can see the other side of the paper.
And a close look at the top of the box - so pretty.
Of course I had to finish the boxes off with a little tag using one of my favorite images from Krista Smith over at Saturated Canary called 'Boobie Love' (which is currently free in her shop.)
See you next time, thanks for stopping by.
Michelle
Thursday, October 4, 2012
Hourglass Butterfly Box and Card
Hi All,
Got back from my weekend in San Francisco only to find that a couple of posts I had planed while I was away didn't actually go 'live' (I guess it helps if you hit the 'Publish' button instead of 'Save'!!!) So now I am playing a little bit of catch up.
Today's project is an hourglass box by Kelleigh over at The Digichick. It is such a pretty little box, and when I found this...
a Martha Stewart pad for only $3.00 at Marshalls - I knew just what to do with it.
As with all Kelleigh's files they are super easy to put together, with the addition of some ribbon and a little embellishment they look like you've spent ages over them.
The beautiful butterfly you see adorning this box I cannot take credit for, it was made by my friend Pam over at Papillon Digital Designs, it really is beautiful - thank you so much Pam. Here is a closer look.
I also wanted to added a card to go along with this box and was thinking along the lines of wedding, but I feel that it would suit Mother's Day or a female birthday equally well.
This image is from my favourite place to get digital images Saturated Canary (Krista's images are adorable, you should check them out.) I coloured the image with ProMarkers, added some stickles, silver gems and a doily - here's a closer look at the details.
Thanks for taking a look at my projects today.
Michelle
Got back from my weekend in San Francisco only to find that a couple of posts I had planed while I was away didn't actually go 'live' (I guess it helps if you hit the 'Publish' button instead of 'Save'!!!) So now I am playing a little bit of catch up.
Today's project is an hourglass box by Kelleigh over at The Digichick. It is such a pretty little box, and when I found this...
a Martha Stewart pad for only $3.00 at Marshalls - I knew just what to do with it.
As with all Kelleigh's files they are super easy to put together, with the addition of some ribbon and a little embellishment they look like you've spent ages over them.
The beautiful butterfly you see adorning this box I cannot take credit for, it was made by my friend Pam over at Papillon Digital Designs, it really is beautiful - thank you so much Pam. Here is a closer look.
I also wanted to added a card to go along with this box and was thinking along the lines of wedding, but I feel that it would suit Mother's Day or a female birthday equally well.
This image is from my favourite place to get digital images Saturated Canary (Krista's images are adorable, you should check them out.) I coloured the image with ProMarkers, added some stickles, silver gems and a doily - here's a closer look at the details.
Thanks for taking a look at my projects today.
Michelle
Thursday, September 20, 2012
Clover Box (and a little something else.)
Hi Everyone, today I am guest designer over at The Bugbytes.
I know that last time I was there my project was the Pyramid Boxes, and I find myself there today with another box. But I make no apology for it, because it is so stinkin' cute, and so stinkin' simple. I am on the Creative Team for Kelleigh Ratzlaff over at The Digichick, and when she asked the team to use her file to make this box I fell in love. Here are the boxes I made.
Aren't they sweet? Just two pieces to cut and score - and only the lid need a little glue. Here is a look at the inside (with the little something else that my post title mentions.)
The inside of the box is just folded, and held in position with the lid. How easy is that? The contents of the box are Hershey's nuggets, I used a strip of paper (1" x 3") and stuck it around the wrapper - really dresses up some everyday chocolate don't you think?
I used K&CO double sided paper for this project - having the inside of the box decorated just finishes it off nicely.
Here is another box I made, this one I cut slightly larger (so I could fit a few more chocolates in.)
I think I may have gone a bit over the top with the lace, but I needed something with that Cameo Silhouette on top - strangely enough I cut that with my Silhouette Cameo! Here is a look at the inside.
The paper I used for this project I actually printed myself, it is from the Comfort Cafe Collection DVD from Stampin' Up.
The file for these cute little boxes is available here.
Thanks for taking a look at my project today.
Michelle
Thursday, September 13, 2012
Thinking "outside" the cutting file
Today I am using a Baby Themed cutting file by Kelleigh Ratzlaff - don't go all pink/blue and lemon on me now, my projects may not be what you are expecting. Kelleigh has been updating her store on The Digichick, (after the server crashed) and she asked if her creative team could come up with some projects. I have to admit that I was initially scratching my head over this one - I have nothing and no-one to create baby stuff for.
I took a look at the files for the rattle and diaper, the old cog-wheels started to turn and this is what I ended up with.
I cut the center out of the rattle, added some vellum, twine and a tag - now it's a magnifying glass.
I took a look at the files for the rattle and diaper, the old cog-wheels started to turn and this is what I ended up with.
Now I'm sure all of your are scratching your heads and wondering 'what the heck?' Well, I took the rattle file and just interpreted the shape in a different way. Here is the first project.
This second project is a looking glass. I added some shiny silver for the mirror (yes that reflection is me taking the picture), a crown, some gems and ribbon. When you open it up here is what is inside.
And my final project - I think this one speaks for itself.
And inside this one.
These would all make cute little notes to pop into the kids lunch box or backpack to find later in the day at school.
I used my Cameo to cut all the files, and Amy Chomas pen holder to write the sentiments.
I hasten to add here that these files are adorable to just make up for what they are intended a 'rattle' and a 'diaper' - take a look here to see some of the cute projects. But next time you look at file you feel you have little use for challenge yourself to 'think outside the cutting file.'
Thanks for stopping by.
Michelle
Thursday, August 23, 2012
Whooooo loves you?
Hi everyone - can't believe that a whole week has gone by and I haven't posted (naughty blog momma that I am.) Today Kelleigh over at Kelleigh Ratzlaff Designs is hosting a "Back to School" blog hop - the creative team has come up with some cute projects so I hope you are able to take a peek (and there is a chance to win a prize!)
I have been so busy with life in general and getting my youngest daughter packed up and ready to go back to university I didn't think I had time to make a project for the blog hop. As my daughters are both at university I wasn't really sure I could do this theme justice - WRONG. Although my girls are that much older, they still appreciate a 'little something' to send them on their way back to their studies. This is what I came up with.
Both of these files are available in Kelleigh's store here. I just love the owl card - isn't he adorable?
He is so simple to put together (love that.) I ran his 'chest' and 'wings' through an embossing folder, and used googly eyes instead of the paper pieces from the template. You can find the owl template here.
Here is the inside - I created the sentiment using the Amy Chomas pen holder on my Cameo.
The paper I used for this file I actually printed myself on my wide format printer, it is a pattern available in the Silhouette online store (designed by Lori Whitlock.) The only change I made to the file was to cut a hole in one of the sides (1 3/4" in diameter) to accommodate one of the sweet treat cups from Stampin' Up - this acts as a little 'peep-hole' so that you can check out exactly what is inside.
I also added a little tag with a gold ball chain fastener to the top of the box.
The file for the gable box is available here - did I mention that it is on sale?
Thanks for stopping by today and looking at my project, I hope you will hop on over to Kelleigh's Blog, to see what she has going on and maybe even win a prize.
Michelle
I have been so busy with life in general and getting my youngest daughter packed up and ready to go back to university I didn't think I had time to make a project for the blog hop. As my daughters are both at university I wasn't really sure I could do this theme justice - WRONG. Although my girls are that much older, they still appreciate a 'little something' to send them on their way back to their studies. This is what I came up with.
Both of these files are available in Kelleigh's store here. I just love the owl card - isn't he adorable?
He is so simple to put together (love that.) I ran his 'chest' and 'wings' through an embossing folder, and used googly eyes instead of the paper pieces from the template. You can find the owl template here.
Here is the inside - I created the sentiment using the Amy Chomas pen holder on my Cameo.
Let's take a closer look at the gable box.
I also added a little tag with a gold ball chain fastener to the top of the box.
The file for the gable box is available here - did I mention that it is on sale?
Thanks for stopping by today and looking at my project, I hope you will hop on over to Kelleigh's Blog, to see what she has going on and maybe even win a prize.
Michelle
Saturday, March 24, 2012
Cupcakes anyone?
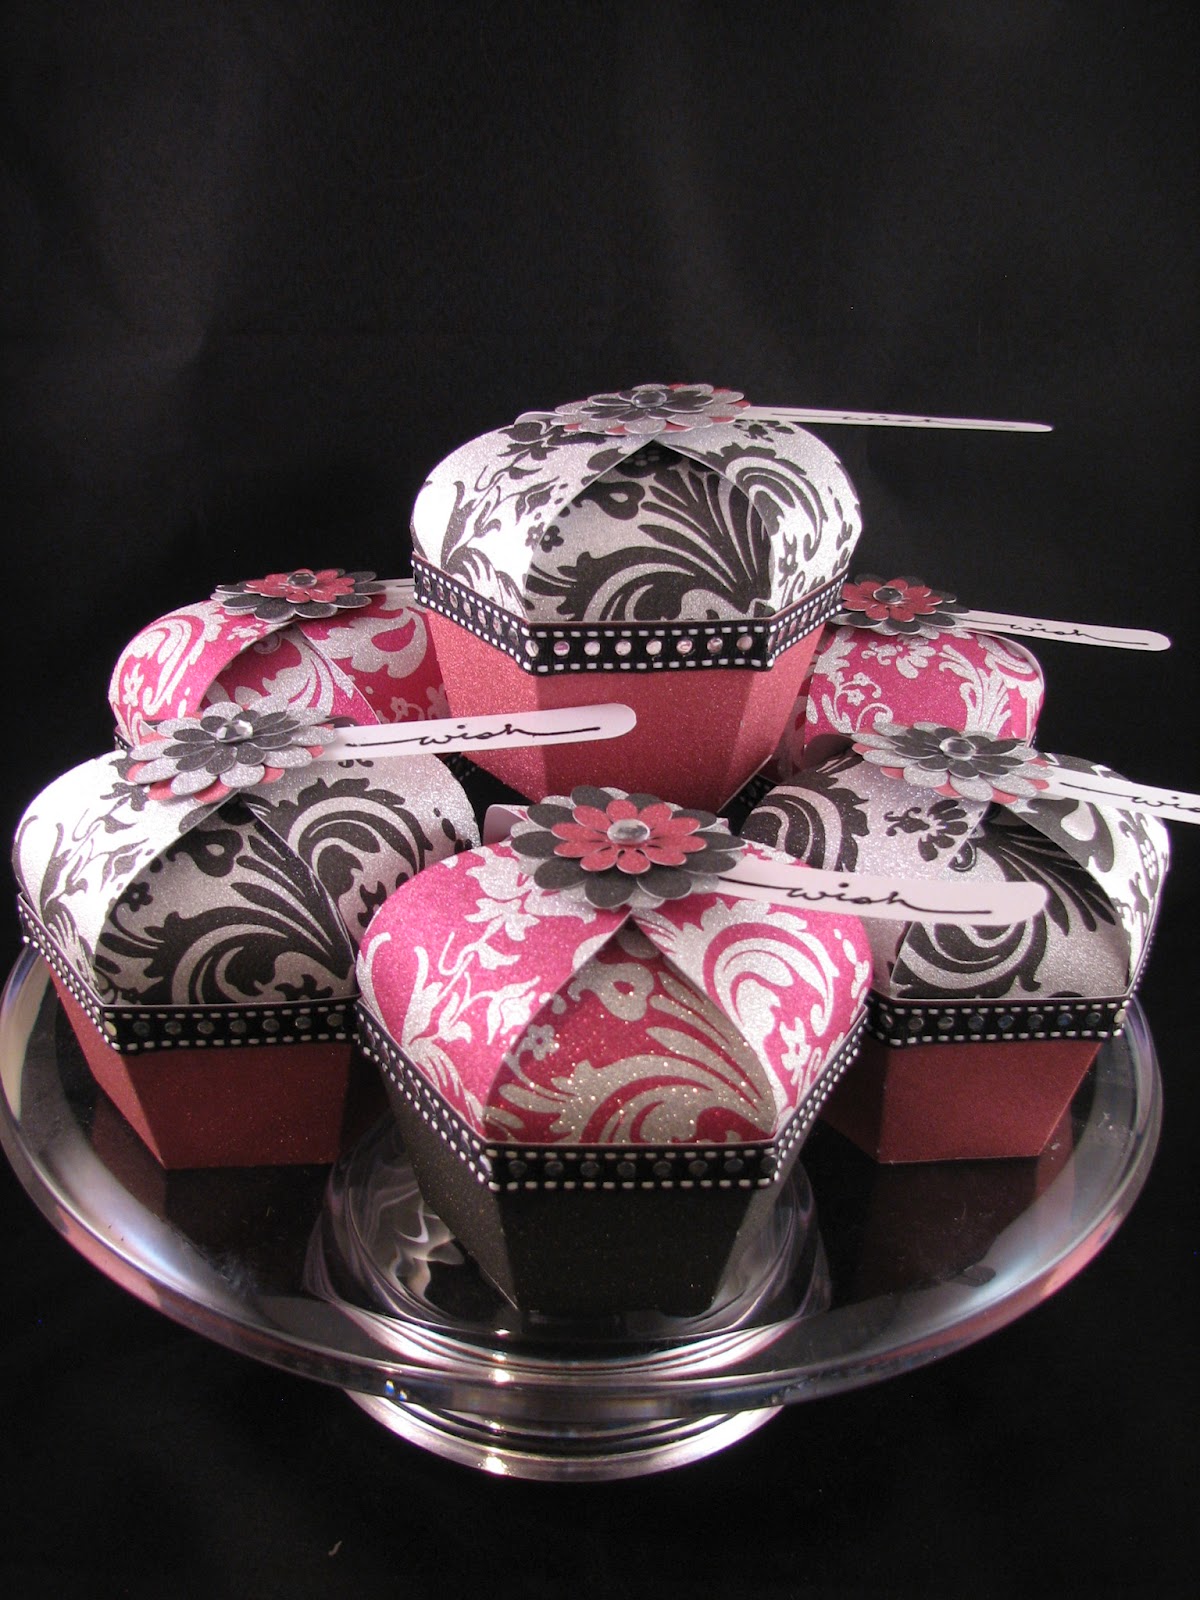
Although this was a fairly straightforward project, it ended up taking me a couple of days to complete. I just couldn't make up my mind - which paper combination, which embellishments, too much not enough? This is what I finally settled on, and I'm pretty pleased with the results.
Aren't they cute? This file is designed by Kelleigh Ratslaff, and can be found at The Digi Chick. They are so simple to put together, and Kelleigh has great pictures and step-by-step instructions on her blog Kelleigh Ratzlaff Designs.
The papers I used to make the cupcakes are from 'The Glitzy Glitter Stack' (DCWV) in both bright and neutral.
I love this paper, it is so smooth and when you cut it with your die-cutting machine the glitter doesn't flake off or get stuck to your mat.
Here is a close-up of one of the cupcakes.
I used Scor-Tape to adhere the ribbon (from Michael's) to the top off the cupcake wrapper, and the flowers on top are cut from a silhouette file in the same papers.
The finishing touch is an adhesive backed gem in the center of the flower, and a sentiment from 'Small Script' (Stampin' Up) heat embossed on vellum. The flower and sentiment are held together with adhesive dots.
The cupcakes are for an event I'm attending later in the summer, so I haven't actually filled them with goodies yet. They would be a great size for holding a few chocolates, or a piece of jewelry. There are so many options for these they would be great for a bridal shower (they would look stunning just plain white) or a baby shower in a colors to co-ordinate with the theme.
As always thanks for stopping by.
Michelle
Aren't they cute? This file is designed by Kelleigh Ratslaff, and can be found at The Digi Chick. They are so simple to put together, and Kelleigh has great pictures and step-by-step instructions on her blog Kelleigh Ratzlaff Designs.
The papers I used to make the cupcakes are from 'The Glitzy Glitter Stack' (DCWV) in both bright and neutral.
I love this paper, it is so smooth and when you cut it with your die-cutting machine the glitter doesn't flake off or get stuck to your mat.
Here is a close-up of one of the cupcakes.
I used Scor-Tape to adhere the ribbon (from Michael's) to the top off the cupcake wrapper, and the flowers on top are cut from a silhouette file in the same papers.
The finishing touch is an adhesive backed gem in the center of the flower, and a sentiment from 'Small Script' (Stampin' Up) heat embossed on vellum. The flower and sentiment are held together with adhesive dots.
The cupcakes are for an event I'm attending later in the summer, so I haven't actually filled them with goodies yet. They would be a great size for holding a few chocolates, or a piece of jewelry. There are so many options for these they would be great for a bridal shower (they would look stunning just plain white) or a baby shower in a colors to co-ordinate with the theme.
As always thanks for stopping by.
Michelle
Thursday, March 15, 2012
Ladybug Notepad
Last week my youngest, Phoebe was home from college on spring break. She told me that her room-mate loved the handmade cards and things that I send Phoebe. Well, it's always nice to be appreciated, so I decided to make this little notepad so her roommate could have it on her desk.
This is a cut file available from here from The Digi Chick. It can be made into a card or mini album, and although probably more suited to a 'little gir'l, my daughter assures me that the' big girl' who is going to receive this will love it.
The file comes in 3 parts: the body (black), 2 wings (red) and the 6 spots (black glitter). I used my Cameo to cut and re-size all the pieces, and then made large circles with white paper that were just slightly smaller than the body. I punched a hole through everything and fixed it together with a brad. Of course I had to add some googly eyes too!
Each of the notepad pages is stamped with a ladybug image - this stamp is from Stampin' Up and is called 'Very Punny'.
Hope you enjoyed my project today.
Michelle
This is a cut file available from here from The Digi Chick. It can be made into a card or mini album, and although probably more suited to a 'little gir'l, my daughter assures me that the' big girl' who is going to receive this will love it.
The file comes in 3 parts: the body (black), 2 wings (red) and the 6 spots (black glitter). I used my Cameo to cut and re-size all the pieces, and then made large circles with white paper that were just slightly smaller than the body. I punched a hole through everything and fixed it together with a brad. Of course I had to add some googly eyes too!
Each of the notepad pages is stamped with a ladybug image - this stamp is from Stampin' Up and is called 'Very Punny'.
Hope you enjoyed my project today.
Michelle
Thursday, March 1, 2012
Just a 'little' note
Well, I can't believe I have been back from Florida since Sunday and this will be my first post - what a 'slacker'!
My project today is this cute little box from Kelleigh over at The Digi Chick. I just love the design of this top heavy box and couldn't wait to put it together so that I could embellish it.
The paper I used is from K & Company (I'm not sure which line it is), the flower is cut from a Silhouette file and the butterflies are a Martha Stewart punch. Here is a close up of the flower, which has been sprayed with Perfect Pearls Mist and finished off in the center with a pearl brad.
I wanted to make some little note cards and envelopes to go inside - these are very small (2.25" x 3.5"). They are just the right size for writing a quick 'hello' or 'thank you' to put with a gift. The stamps I used for these are from The Angel Company ('Just Because' and the Russian Proverb) and Stampin' Up ('Hello' - Elementary Elegance.)
Here they are all together in the box.
Thanks for stopping by - I promise not to leave it too long until next time.
Michelle
My project today is this cute little box from Kelleigh over at The Digi Chick. I just love the design of this top heavy box and couldn't wait to put it together so that I could embellish it.
The paper I used is from K & Company (I'm not sure which line it is), the flower is cut from a Silhouette file and the butterflies are a Martha Stewart punch. Here is a close up of the flower, which has been sprayed with Perfect Pearls Mist and finished off in the center with a pearl brad.
I wanted to make some little note cards and envelopes to go inside - these are very small (2.25" x 3.5"). They are just the right size for writing a quick 'hello' or 'thank you' to put with a gift. The stamps I used for these are from The Angel Company ('Just Because' and the Russian Proverb) and Stampin' Up ('Hello' - Elementary Elegance.)
And of course there have to be matching envelopes.
Thanks for stopping by - I promise not to leave it too long until next time.
Michelle
Monday, February 13, 2012
Buxom Ladies - Treat Boxes
This is just a quick post to show you the treat holders I made for my daughter and her friends when we took them out to dinner last week.
The file comes from The DigiChick and is actually a 'Heart Cup' designed by Kelleigh Ratzlaff. I knew when I saw them that they would be great to be transformed into 'Buxom Ladies' (maybe that's why my friends call me the smut queen.)
Here are a couple more.
These came together so quickly, I used some scraps from The Blackcurrant Stack (DCWV), some buttons and lace from my stash - that's it.
Phoebe and her friends got a big 'kick' out of them. Now my mind is racing with ideas for how fun these would be for a bachelorette party or bridal shower with white ribbons and lace to make a corset. What fun!
Here are a couple of photos of the girls enjoying their treats.
Thanks for stopping by.
Michelle
The file comes from The DigiChick and is actually a 'Heart Cup' designed by Kelleigh Ratzlaff. I knew when I saw them that they would be great to be transformed into 'Buxom Ladies' (maybe that's why my friends call me the smut queen.)
Here are a couple more.
These came together so quickly, I used some scraps from The Blackcurrant Stack (DCWV), some buttons and lace from my stash - that's it.
Phoebe and her friends got a big 'kick' out of them. Now my mind is racing with ideas for how fun these would be for a bachelorette party or bridal shower with white ribbons and lace to make a corset. What fun!
Here are a couple of photos of the girls enjoying their treats.
Thanks for stopping by.
Michelle
Subscribe to:
Posts (Atom)