Thursday, March 29, 2012

Felt Bag

Something different today - no paper involved!  When I was in Florida last month I came back with a whole hoard of goodies - I couldn't actually fit everything in my suitcase and ended up mailing a package home.  One of the goodies was this lovely felt bag.  It was given to me by my friend Kymberlee (The Paper Midwife) - well actually it was from her mum.


I couldn't wait to get it home and start playing with it, but what to do HTV? Rhinestones?  Finally I settled on using some of the mass quantities of felt I'd been given (also courtesy of Kymberlee's mum.)  As the Silhouette does not cut felt (unless someone tells me otherwise) I had to find another method (and no I do not do well cutting out mass quantities with scissors.)  So I turned to one of my Sizzix dies and came up with this.


I cut the leaves freehand and sewed the swirls by hand (as you can tell I AM NOT MUCH OF A SEAMSTRESS.)  Here is a close-up of one of the flowers.


Overall I pretty pleased with the way it turned out - and it's fun once in a while to get out of your 'comfort zone'.

Thanks for stopping by.

Michelle

Tuesday, March 27, 2012

Poppy Card

I was looking through a copy of Paper Crafts magazine 'Card Creations - Get Inspired' and came across a very simple 'shaped' card that I just had to replicate.

Many of the files that I cannot resist from the Silhouette online store are the 3D flowers, and I have a few of them (OK most of them.)  One of my favorites is a poppy, so I went straight to it to create this card.


Once I had the file open in the Silhouette Designer software, I took all the pieces and enlarged them by 150%.  Next I ungrouped all the pieces, took the bottom (largest layer) of the flower replicated it using mirror image, moved the two together and then welded them.  The Cameo then did the difficult part and cut everything out for me.  I took a Tim Holtz Distress Ink pad (Vintage Photo) and, using sponge, lightly inked the edges of the petals. The whole thing is assembled with a few glue dots.  The finishing touches are a glittery brad (also sponged with ink) and a sentiment stamped on to kraft cardstock and adhered.

I also made the file at it's original size and used that for a gift tag.  I love the elegant look of this paired with with black wrapping paper.


I hope I have inspired you to take a look at some of the 3d files and use them in a slightly different manner.

Michelle

Saturday, March 24, 2012

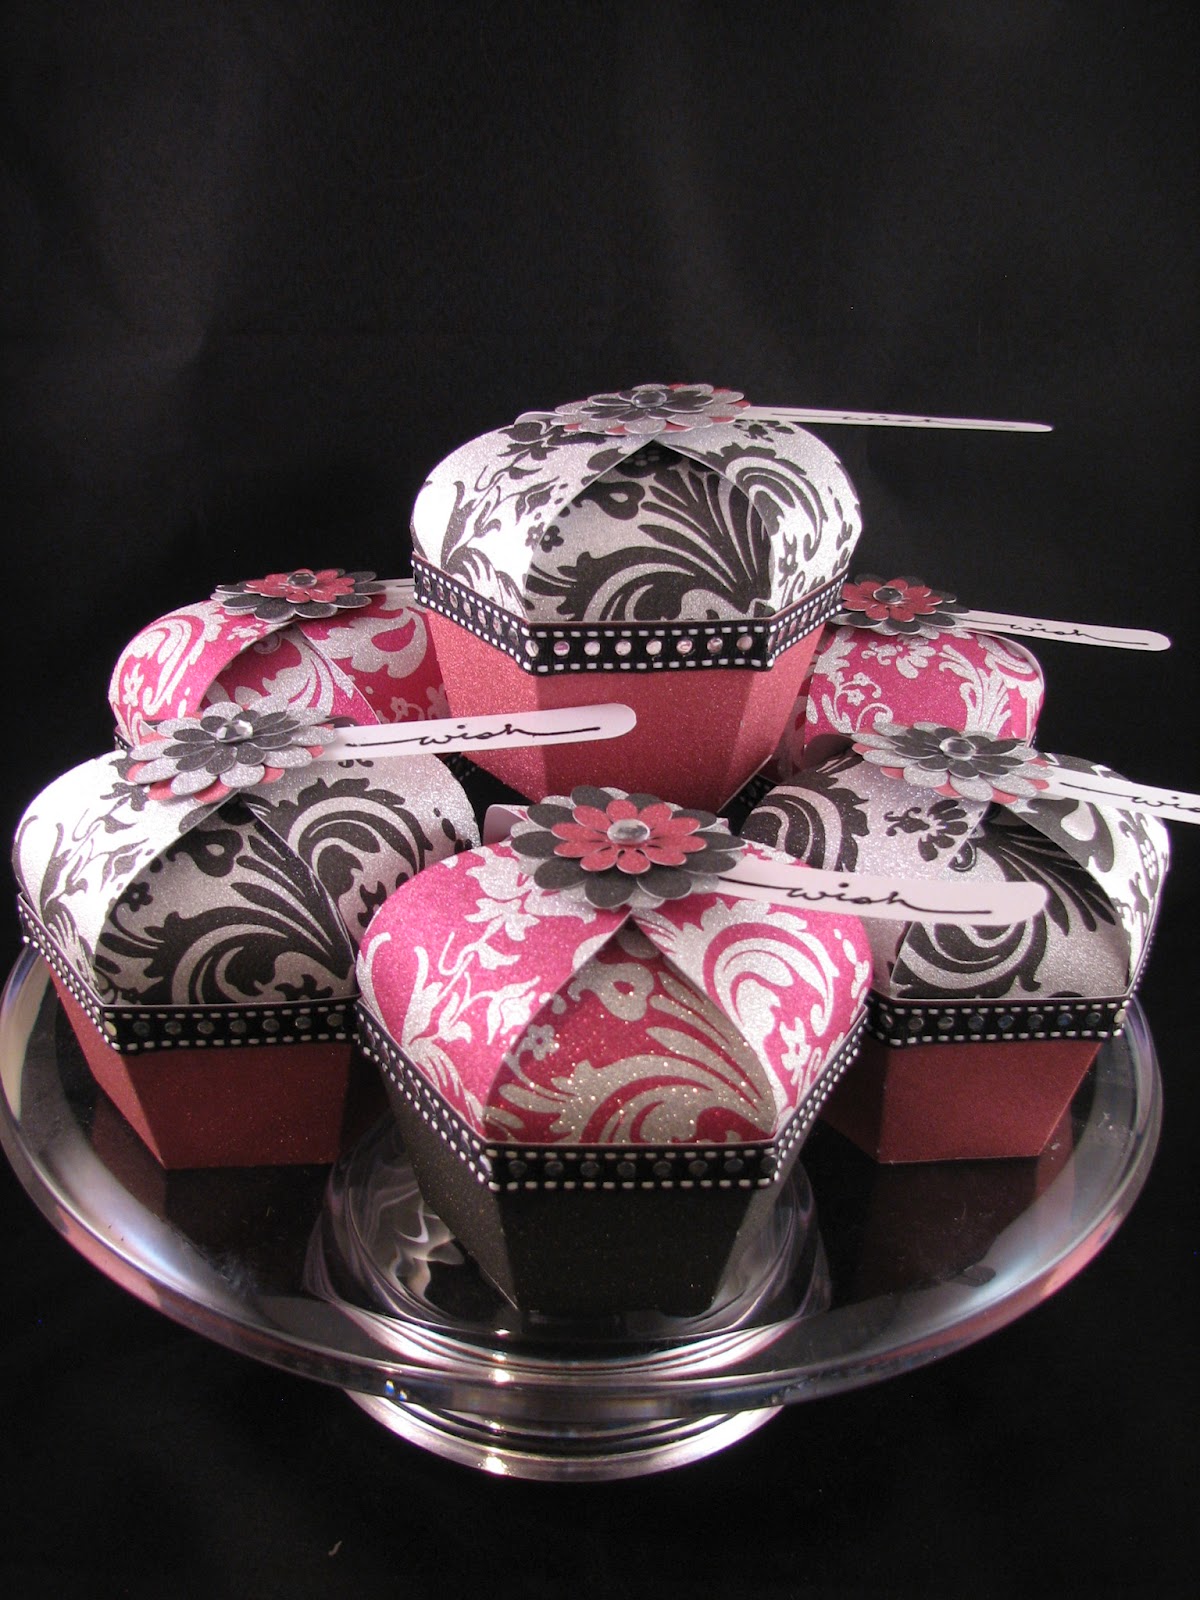
Cupcakes anyone?

Although this was a fairly straightforward project, it ended up taking me a couple of days to complete.  I just couldn't make up my mind - which paper combination, which embellishments, too much not enough?  This is what I finally settled on, and I'm pretty pleased with the results.


Aren't they cute?  This file is designed by Kelleigh Ratslaff, and can be found at The Digi Chick.  They are so simple to put together, and Kelleigh has great pictures and step-by-step instructions on her blog Kelleigh Ratzlaff Designs.

The papers I used to make the cupcakes are from 'The Glitzy Glitter Stack' (DCWV) in both bright and neutral.


I love this paper, it is so smooth and when you cut it with your die-cutting machine the glitter doesn't flake off or get stuck to your mat.

Here is a close-up of one of the cupcakes.


I used Scor-Tape to adhere the ribbon (from Michael's) to the top off the cupcake wrapper, and the flowers on top are cut from a silhouette file in the same papers.


The finishing touch is an adhesive backed gem in the center of the flower, and a sentiment from 'Small Script' (Stampin' Up) heat embossed on vellum.  The flower and sentiment are held together with adhesive dots.

The cupcakes are for an event I'm attending later in the summer, so I haven't actually filled them with goodies yet.  They would be a great size for holding a few chocolates, or a piece of jewelry.  There are so many options for these they would be great for a bridal shower (they would look stunning just plain white) or a baby shower in a colors to co-ordinate with the theme.


As always thanks for stopping by.

Michelle

Friday, March 23, 2012

3D Trees Wall Art

I was working on a project last night that I am hoping to post this weekend, I got the pieces all glued together and decided I would embellish it today.  Unfortunately I discovered this morning that I don't have just the 'right' sort of pretties to finish the project off.  Well, what is a girl to do when she is still in her pj's?  I could hardly run to the craft store :(

So I decided to play with a file I got from the Silhouette online store the other week - 3D Trees Wall Art.


I just love the simplicity of this piece, and it was a breeze to put together.  The only thing I added was the stamped/embossed sentiment from a Stampin' Up set called 'Happy Harmony'.

Now I have lots of ideas buzzing around my head to use this file for Halloween - I can see the whole thing in black with some 'critters' peeking out from behind the trees and some strategically placed glow in the dark glitter....

No more messing around I have to get to the craft store.  Thanks for stopping by.

Michelle

Wednesday, March 21, 2012

Six (6) cards to share - call me a colouring fool!

Over the past couple of weeks I have been playing with my new ProMarkers, colouring both stamped and digital images.  I love the way these colours blend, and want to give a shout out to Kymberlee from The Paper Midwife and Kate from Sassy and Scrappy - who both helped me with some colouring techniques on my recent trip to Florida.  These ladies are both very talented and I recommend you take a peek at their blogs.

First here is a look at my new 'babies' in their case.


Many of these pens were a gift from my friend Cheryl in the UK - who I'm sure is expecting lessons with them when she comes out here in the summer :)

So basically I have become a colouring 'fool', and a little bit of a paper snob - preferring Bee Paper to almost anything else (it's all Kymberlee's fault!) 

Here are the cards.


The image and sentiment for both these cards is from Kraftin' Kimmie Stamps, all the paper is from my stash, the butterflies from a Martha Stewart punch decorated with stickles, and the front of the purple card is embossed with a Tim Holtz embossing folder.


These images are from Mo's Digital Pencil - she has some gorgeous digital images available (I dare you to go look and be able to resist.)  The sentiment stamp on the second card is from a Stampin' Up Set called "Happy Harmony".


Another one from Mo's Digital Pencil (I just love this image - maybe because it reminds me so much of the antics of my youngest when she was this age!)  The paper is from Target (the $1.00 packs), Prima flower, gem brad from Joann's, and the sentiment is computer generated.

My last card is also an image from Mo's Digital Pencil, called "Extra!"  This image is great and just what I needed to make a more masculine card.


Thanks for stopping by today.

Michelle

Friday, March 16, 2012

Quick Birthday Card

I never have enough birthday cards in my stash, for those birthdays/occasions that just seem to pop up.  So today I am sharing with you a quick card I made for Cameo Creations Challenge #4 over here on Monica's Creative Madness.  The challenge is to create a square card using a digital stamp and buttons.  Here it is.


The image is from Digi My World, and I used the print and cut feature of the cameo for it - Monica has a great video tutorial on her blog showing the technique I used.

I used a couple of buttons, one on the balloon and one in her hair.


In the bottom right-hand corner is a journalling tag that I had in my stash, all I have to do is highlight the day and month - voila, a personalized card.


Thanks for stopping by today, and thank you Monica for the great challenge.

Michelle

Thursday, March 15, 2012

Ladybug Notepad

Last week my youngest, Phoebe was home from college on spring break.  She told me that her room-mate loved the handmade cards and things that I send Phoebe.  Well, it's always nice to be appreciated, so I decided to make this little notepad so her roommate could have it on her desk.


This is a cut file available from here from The Digi Chick.  It can be made into a card or mini album, and although probably more suited to a 'little gir'l, my daughter assures me that the' big girl' who is going to receive this will love it.

The file comes in 3 parts: the body (black), 2 wings (red) and the 6 spots (black glitter).  I used my Cameo to cut and re-size all the pieces, and then made large circles with white paper that were just slightly smaller than the body.  I punched a hole through everything and fixed it together with a brad.  Of course I had to add some googly eyes too!


Each of the notepad pages is stamped with a ladybug image - this stamp is from Stampin' Up and is called 'Very Punny'.


Hope you enjoyed my project today.

Michelle