Thursday, February 2, 2012

Underwear Mishap Inspiration

It really is strange sometimes where my inspiration comes from.  My project today is a typical example of this.  A couple of weeks ago I bought some gift bags at the store that I wanted to duplicate.  I forgot all about them until a friend related a story of her 'underwear mishap' involving a new bra 'fastener' (that didn't), and the delivery man (who arrived when he shouldn't) - not going into details, let's just say blushes all round.


I just took a plain Kraft gift bag, and cut off the handles, then embellished it with some double-sided paper (K & Co I believe), some ribbons (to replace the string handles), lace and buttons.  The corset beneath is a file from Silhouette.


Thought that this was a cute way to add a feminine touch to an otherwise pretty boring gift bag.

Thanks for taking a peek.

Michelle

Monday, January 30, 2012

Queen for the Day Birthday Card

Just a quick post today for a fairly simple card that I made yesterday.  One of the main reasons for me buying the Silhouette Cameo is that I wanted to use the "Print and Cut" feature.  Despite having the machine since before Christmas this is the first time I have really played with this feature - here is my card.


This image comes from Digi My World, and is called Tiffany Chibi Birthday Girl.  I downloaded the files, (they come in JPEG and PNG), and imported them into my Silhouette Designer Studio.  My next step was to trace the image, fill it with various colours and then send it to the printer.  Once the image was printed I put it on the mat and loaded it into the Cameo to cut.  There are some great tutorials on how to do this on YouTube.

The real "wow" factor of this card however lies on the inside.


This is a file from Silhouette online store, and as soon as I saw it I just knew I had to have it. I think it just finishes off the card perfectly.

On a side note, a few of my 'friends', (I use the term loosely), suggested I replace the words with "Smut Queen" - I don't know why.

Thanks for stopping by.

Michelle

Saturday, January 28, 2012

Love you...so there!

My good friend Jenny from the UK sent me this beautiful paper pack for Christmas.


Isn't it lovely?  It has been sitting on my craft room desk, being drooled over by me on a daily basis (just as well I left it in the packaging.)  Today I decided it was finally time to use it (someone please revive Allison - I think she has fainted from the shock of actually using paper!)  As I said previously I need to make quite a few cards for next month, and this paper just screams Valentine card to me.


The stamped image is from a set called Gorgeous Girls which I purchase from Funky Kits.  This particular image is called Little Miss Attitude (reminds me of one of my daughters when she was younger - not saying which one.)  I coloured the image with ProMarkers and used some stickles to highlight the hearts on her dress.  here is a close up.


The heart and arrow are a file from Silhouette and cut using my Cameo.  The  'Love You' is also cut with the Cameo, the font I used is Kidprint.  I was going to use the cut out letters, but liked the look of the negative image instead.

The flower embellishment came in the pack, but I decided to add the red gem in the centre to make it 'pop'.


Finally I generated the sentiment inside on the computer using Kidprint font again - here's what it says.


Thank you so much Jenny for this paper, I really love it and I have more left to play with (lucky me!)

Thanks for stopping by.

Michelle

Tuesday, January 24, 2012

I got Soul....

KIA Soul that is.  This is a quick LO that I did after I first go my new car.  Check out that interior, and you will know why I just had to go with with the silver/red/black colour scheme :)


The title was cut with my Cameo, and is a font from my computer (sorry I can't remember the name of it.)  I imported the word 'Soul' and cut it using the Silhouette Designer Software.  'Vroom' is a file from the Silhouette online store, the shadow is simply created using the 'offset' feature (I think I have said before how easy this is to use and therefore how much I love it.)


See you next time.

Michelle

Thursday, January 19, 2012

Make Your Valentine Card Even More Special


Another first for me today - I am guest designer over at The BugBytes.  Thank you so much Pam for inviting me, I am beyond flattered and extremely excited.

I thought I would just make a simple card for Valentines Day for my youngest daughter.  February is a very busy month for me in the card making department as both my daughters have birthdays this month (one actually on Valentines Day.) Don't forget to check the end of this post on how to make your valentine card even more special.

Here is the card I made for her.


This is an SVG file from Lettering Delights, called Kyoto Kuties which was given as a freebie by Jin from Under A Cherry Tree.  I made mine into a card by taking two of the base layers and welding them together in Silhouette Studio.  These are the various component parts cut out and ready to be assembled.


I ran the various pieces through the Xyron machine, and then stuck them all together.  I used pop-dots for her sleeves and hands to give a little more dimension.

In the original SVG file this little girl is holding an umbrella, but I decided to give her this sign instead.  The stamp I bought in the dollar bin at M's several years ago, and the card stock is taped to a toothpick which I coloured with a Stampin' Up marker.

Here is another look at her with the envelope I made from a piece of patterned card stock called 'Harmony' (My Little Shoebox.)


As promised an idea to make your valentine card a little more special, check out this link Valentines Postmark.  I have lived in Colorado since 1999, and was so excited to find out about the special postmark you could get from Loveland, CO.  Over the years I discovered many other places that put special postmarks on envelopes for 14th February - my girls and husband got them every year (of course I never knew who they were from as the cards were never signed.)

Thank you again Pam for inviting me to play, and thanks everyone for stopping by today.

Michelle

Sunday, January 15, 2012

Baby LO's and Onesies.

In a couple of weeks I'm going to a baby shower for a friend.  I've know about this since before Christmas, and at the time was asked if I could make a LO or two. Simple enough, but for some reason I have put this off and found other projects that need my attention.  Why?  This shower is for a boy!!!!!  I have girls, which equals lots of pink paper, flowers ribbons and bows - how do I do a LO for a baby boy?  My next hurdle is how to do a LO with no pictures? I usually make my LO's with my pictures sitting in front of me and work from there.

So this weekend I just decided to go to my craft room and 'bite the bullet'.  After a little searching through my papers I found a few blues/denims, and a great paper stack that my secret Christmas elf (Allison) got me, called "Just Chillin'" (Making Memories).  So here is the first LO I came up with.


Just something fairly simple and straightforward for two 4x6 photos.  Here are some close-ups of some of the page elements, including the title which is a file from the Silhouette online store which I cut with my Cameo.


I love how simple this title was to cut and make the shadows for, just by using the 'offset' button in Silhouette Designer Studio.

For my next LO I went to Page Maps for some inspiration, and found just the right sketch to make this.


With the exception of the background paper all the other papers are from the "Just Chillin'" stack.  The title and all elements were again cut with my Cameo.


I am really quite happy with the way they turned out, and as I was 'on a roll' I decided to pull out some heat transfer vinyl and have fun with some onesies.


For the Chick Magnet onesie I used the Creative Memories Storks Delivery Cart for the font and the Easter 2010 cart for the chick.  The other onesie is made using the same cut that I used on my first LO.

Thanks for stopping by.

Michelle

Friday, January 13, 2012

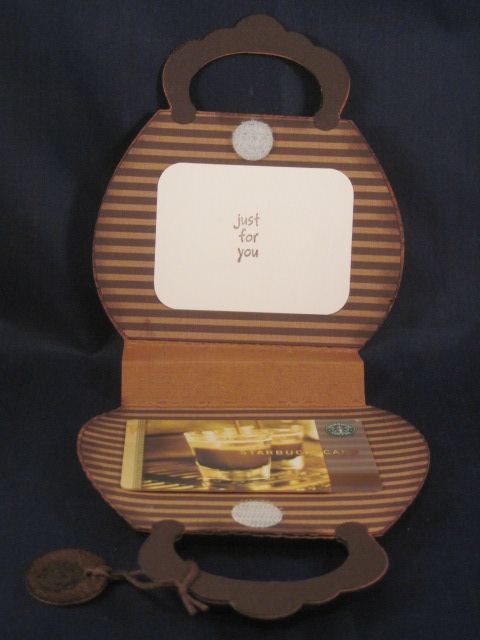
Faux Leather Purse

Today I am making my debut as a guest designer over on Paper Craft Weekend Challenge, thank you so much Allison and Caroline for giving me this opportunity. Here is my project, if you would like to see more pictures and details, please take a look at the Paper Craft Weekend Challenge blog.


Thanks for stopping by.

Michelle