Friday, March 9, 2012

Heat Transfer Vinyl and Rhinestone T-Shirt (Part 2)

For the next part of this project I went back to the Cameo and pulled up the floral filigree image - as I was only working with the central part I copied this part of the image to another page to work on.  Before starting to fill in the rhinestone design I had to check the size of my rhinestones.


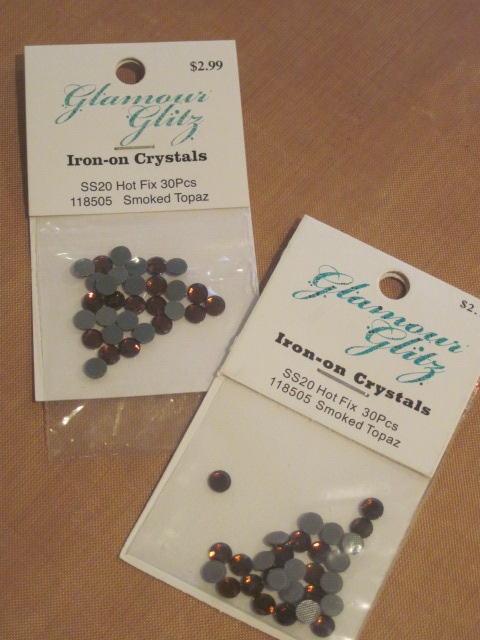
These ones are 20SS.  Next I opened the 'Rhinestones Window' on the Cameo.


I chose the rhinestone sizes, and the 'Draw Rhinestones' option 'Single Click'.


Then I just filled my central image with rhinestone holes.


Once I had filled the image to my liking, I deleted the outer edge (leaving just the rhinestone holes) and cut out the image on rhinestone template.  The next pictures show the setting I used and the template loaded in the machine blue side uppermost.            


Once I had the template cut I peeled it off the backing and stuck it on to a backing board.


Then I sprinkled my rhinestones over the template, using Silhouette brush supplied in the kit  gently brushed them in place.  I will admit here that I found this a bit tedious and ended up picking up some of the rhinestones and placing them where I wanted them.


Once the rhinestones were in place I carefully laid the transfer tape over, and voila my rhinestones are ready to iron on.


To iron the rhinestones on I just positioned them on the shirt, covered them with a thin cloth and with the iron on 'wool' setting pressed down on top for 45 - 60 seconds.  After peeling off the transfer tape I turned the shirt inside out and iron the back of the rhinestones to "pull the glue into the fabric."

Here is the finished design.


Until next time.

Michelle

Thursday, March 8, 2012

Heat Transfer Vinyl and Rhinestone T-Shirt (Part 1)

I bought this plain t-shirt last year thinking that it would be good to use for heat transfer vinyl (HTV).  I had lots of different ideas swirling around in my head, and that is where they stayed, because life got busy.  So today I decided to 'bite the bullet' and finally do the project.

I started with just a plain long sleeved t-shirt, and picked out a design from my Silhouette studio.  I started out by cutting my design out on plain paper and laying it on the shirt to see how it would look.


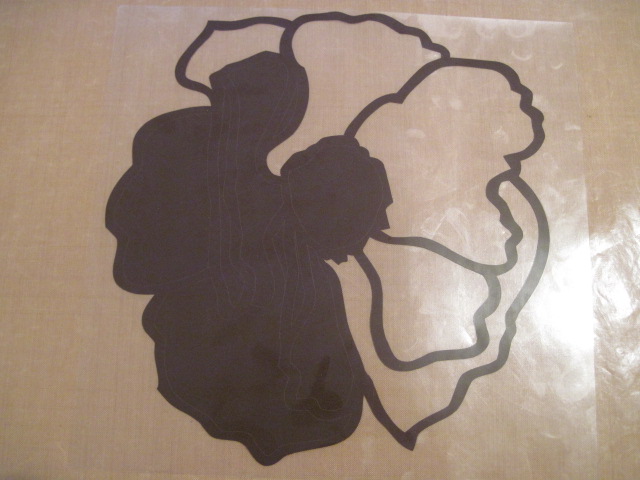
Originally I had made the design 12" x 12", then I discovered that my vinyl was 12" x 9" so I had to make a few adjustments to the size.  Here is the original design, it's called floral filigree.


Because I knew that I wanted to put rhinestones in the centre of the flower, I had to adjust the design to make the centre a blank space.  I had to take each of the shapes from the middle and delete them ( you need to ungroup them first.)


When I had gotten rid of all the little shapes, I took the 'draw freehand' pencil and drew a shape which would be cut out from the centre.


When I was happy with my freehand shape I grouped it with the rest of them image.  This is important to remember as some images need to be flipped before cutting them in vinyl (letters are a good example of this.)

Next I moved on to cutting my image out of the HTV.  I got my HTV from Craft Vinyl - the prices here are great and Nick is very efficient with fulfilling the orders and shipping.

HTV needs to be cut with the DULL SIDE FACING UP and the SHINY SIDE FACING UP (the exact opposite of how you cut regular vinyl.)  Here are the settings which I used on my Cameo.


Once the HTV was cut I started to 'weed' - that is, peel away all the unwanted parts of the image, leaving the main image attached to the backing (this backing acts as transfer tape.)  Here is the partially 'weeded' image.


Now for the fun part - applying the image to the shirt.  First I ironed my shirt, just to make sure I'd removed any moisture.  Next I laid the image where I wanted it on the shirt, covered it with a Teflon sheet and began ironing.  The HTV comes with full instructions for applying, but basically the iron needs to be 280-300F, press the iron down on the Teflon sheet moving it back and forth, not staying in anyone place for more than a few seconds.  This HTV is 'cold peel' which means that it needs to cool down for 30 - 45 seconds before trying to peel off the backing.  Here is the image applied.


Tomorrow I will post pictures of the finished shirt with instructions for adding rhinestones.

Thanks for stopping by.

Michelle
Tuesday, March 6, 2012

Bright Ideas Notebook (using vinyl)

I decided on a very simple project today - blame it on a lack of sleep plus a dog, who despite my tiredness, still insisted on getting up at 6.00am for breakfast!

While I was in Florida I received this cute little note book from my friend Kymberlee  The Paper Midwife,  (well actually from her mom,) - thank you so much.


I just love it, and whilst it is very cute just as it is, I still want to have some kind of simple decoration on it.  Then I had this 'bright idea' of using some vinyl - this is what I came up with.


I cut the vinyl with my cameo (I used the recommended silhouette settings for vinyl with the exception of upping the blade depth to 2.)  The polka dot lamp is a Silhouette file and and font is called DokChampa.  I love how it turned out.

Michelle

Thursday, March 1, 2012

Just a 'little' note

Well, I can't believe I have been back from Florida since Sunday and this will be my first post - what a 'slacker'!

My project today is this cute little box from  Kelleigh over at The Digi Chick.  I just love the design of this top heavy box and couldn't wait to put it together so that I could embellish it.


The paper I used is from K & Company (I'm not sure which line it is), the flower is cut from a Silhouette file and the butterflies are a Martha Stewart punch.  Here is a close up of the flower, which has been sprayed with Perfect Pearls Mist and finished off in the center with a pearl brad.


I wanted to make some little note cards and envelopes to go inside - these are very small (2.25" x 3.5").  They are just the right size for writing a quick 'hello' or 'thank you' to put with a gift.  The stamps I used for these are from The Angel Company ('Just Because' and the Russian Proverb) and Stampin' Up ('Hello' - Elementary Elegance.)


And of course there have to be matching envelopes.


Here they are all together in the box.


Thanks for stopping by - I promise not to leave it too long until next time.

Michelle

Sunday, February 26, 2012

This is what awaits my return....

...a nice clean craft room.


I have lots of fun projects planned and can't wait to get started.  I hope you'll check back and see.

Michelle

Friday, February 24, 2012

Something you need in Florida....a THONG.

Yes you read that correctly, I'm giving my friends who are with me in Florida (and those joining us via skype) a thong.  Here is the packaging I made for it.


This is what the label says.


And here is what is inside.


A book thong of course, what were you thinking?

Until next time.

Michelle

Wednesday, February 22, 2012

Girlfriends Card

By the time you are reading this, hopefully I will be winging my way to sunny Florida leaving behind the snow of Colorado.  I'm to meet a wonderful group of friends, who I got to know online through crafting.  Most of us have not met each other in person but we chat over face book a lot (and I mean a lot!)

Unfortunately not everyone will be able to attend our retreat in person, there are four ladies who will be joining us via Skype.  So here is a little card I made for each of them.


This stamp is from Art Impressions and is from the 'Girlfriends' series.  I love these stamps, and had so much fun making these cards because it combined two of my favorite things paper piecing and colouring with ProMarkers.


I hope that you ladies will get as much pleasure the cards as I did making them.

Check back in on Friday and see what else I put in their packages.

Michelle